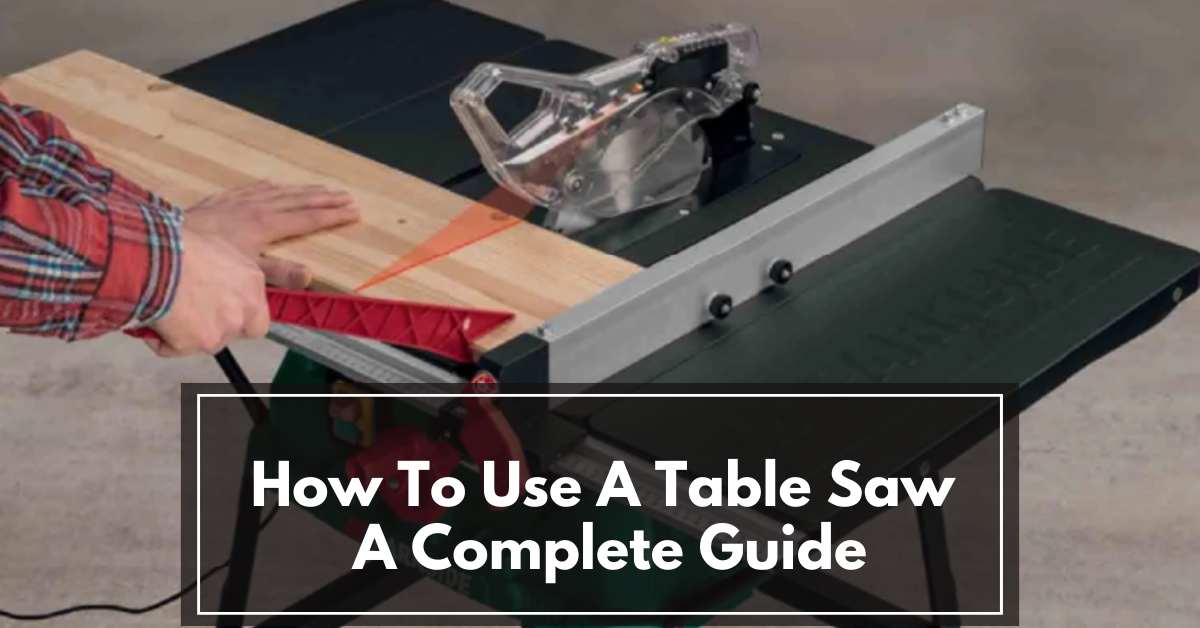
How To Use A Table Saw — A Complete Guide For Beginners
If you’re a woodworking enthusiast or a DIYer who wants to take your woodworking projects to the next level, a table saw can be a valuable tool in your arsenal, and learning how to use a table saw properly will be an added advantage.
However, like any power tool, using a table saw requires knowledge, skill, and safety precautions. In this comprehensive guide, we’ll show you everything you need to know about using a table saw as a beginner, from setup to safety, and even some advanced tips to help you get the most out of your table saw and maximize the potential of the versatile tool.
Check out our complete guide on How to Set Up Your DeWalt Table Saw Stand
Table of Contents
- 1 Understanding the Table Saw
- 2 Parts of a Table Saw
- 3 Types of Table Saws
- 4 Safety First: Table Saw Safety Tips
- 5 Setting Up Your Table Saw
- 6 Basic Table Saw Techniques
- 7 Advanced Table Saw Techniques
- 8 Maintenance and Troubleshooting
- 9 Conclusion
- 10 FAQs — How To Use A Table Saw
- 10.0.1 What safety precautions should I take when using a table saw?
- 10.0.2 Can I use a table saw for cutting materials other than wood?
- 10.0.3 How do I choose the right blade for my table saw?
- 10.0.4 Can I perform bevel cuts on any table saw?
- 10.0.5 What's the difference between a rip fence and a miter gauge?
- 10.0.6 How do I prevent kickback on a table saw?
- 10.0.7 What's the best way to clean and maintain a table saw?
Understanding the Table Saw
The table Saw is a highly versatile power tool that offers a wide range of applications, making it an essential addition to any woodworking or construction workshop. However, due to its complex nature and potential risks, it is imperative to have a comprehensive understanding of the various components and operating principles before embarking on any cutting task.
Before you start using your table saw, you should familiarize yourself with the complexity of its design, parts, and features. This knowledge not only ensures safety but also enhances your ability to use the tool effectively. Let’s take a closer look at the table saw and its components.
Parts of a Table Saw
- The Table Saw blade: The saw blade is the heart of the table saw. This is a circular cutting tool designed for a variety of materials including wood, plastic, and metal. Table saws are available in a variety of types, and each type has its blade, suitable for specific tasks.
- Rip Fence: The rip fence is a guide that helps you make straight cuts, parallel to the edge of the workpiece. It ensures precision and consistency in your cuts.
- Miter Gauge: The miter gauge is a guide that allows you to make crosscuts and angled cuts. It can be adjusted to various angles to achieve precise cuts.
- Blade Height Adjustment: This control lets you adjust the height of the blade. You should set it according to the thickness of the material you’re cutting.
- On/Off Switch: The ON/OFF switch powers the saw. Ensure it’s easily accessible and functional for safety reasons.
- Throat Plate: The throat plate covers the gap around the blade to prevent materials from falling into it. It’s removable for blade changes and cleaning.
For more about table saw and its application, check out our detailed post on table saw uses and application.
Types of Table Saws
There are three main types of table saws; these are Portable or Benchtop, Jobsite or Contractor, and Hybrid, or Cabinet.
Portable or Benchtop Table Saw: These are lightweight, compact, and made-to-be portable table saws. They’re great for minor DIY jobs, however, they could lack the power and precision needed for larger work.
Jobsite or Contractor Table Saw: These are more powerful and larger than portable table saws. They are frequently utilized by professionals and serious enthusiasts. They are also mobile thanks to a stand and wheels that cater to this function.
Cabinet Table Saw: These are powerful heavy-duty saws with a big work surface and excellent precision. They are most commonly seen in professional woodworking facilities and provide the highest level of accuracy.
Now that you are aware of the three main types of table saws, it is best to choose the type of table saw that best suits your needs and available space.
Recommended table saws for each case…


Safety First: Table Saw Safety Tips
Safety should always be your top priority when using a table saw. In this section, we’ll look at some safety tips and guidelines that can help protect you and others during woodworking:
For a complete safety guide and tips, see the Essential Table Saw Safety Tips for Both Pros and DIYers
Wear Safety Gear: These safety gear include safety glass, hearing protection, and a dust mask.
- Safety Glasses: Protect your eyes from flying debris.
- Hearing Protection: Reduce the noise generated by the saw.
- Dust Mask: Prevent inhaling harmful dust particles.
Appropriate Clothing: It is a good practice and safety measure to always wear clothing suitable for woodwork projects. Avoid wearing loose-fitting clothing that could get caught in the saw. This may be very dangerous.
Read the Manual: Before using your table saw, it is recommended to read and comprehend the owner’s manual thoroughly. It includes vital safety advice as well as instructions relevant to your saw.
Maintain a Clean Workspace: Maintaining a clean and organized workspace is essential for accident prevention. By removing potential hazards and dangerous tools, you can significantly reduce the risk of unnecessary accidents.
Use Push Sticks and Push Blocks: When making narrow cuts, always use push sticks or push blocks to keep your hands away from the blade. Never use your fingers to guide the material.
Keep Hands and Body Away from the Blade: Maintain a safe distance from the blade at all times. Never reach over the blade, and keep your hands and body clear of the cutting path.
Disconnect Power: When changing blades, sharpening saw blades, or making adjustments, always make sure that the table saw is disconnected from the power source. Please turn it off and completely unplug it from the power source to prevent accidental startup.
See our guides on how to sharpen a table saw blade and how to clean a table saw blade
Use a Blade Guard and Riving Knife: A blade guard and riving knife help prevent kickback and protect your hands. Keep these safety features in place whenever possible.
Stay Alert and Focused: Finally, avoid distractions and focus on your work. Accidents often occur when attention wavers.
Setting Up Your Table Saw
Setting up your table saw properly is essential for ensuring both accuracy and safety during your cutting tasks. To achieve this, follow these steps for a successful setup:
- Location and Stability: To avoid wobbling or vibrations during operation, it is a wise choice to place your table saw on a stable, level surface. Also, make sure you have enough room around the saw for your workpieces and mobility.
- Blade Alignment: Check if the blade is parallel to the miter slot. If not, follow the manufacturer’s instructions to adjust it. Proper alignment ensures accurate cuts.
- Blade Height: The blade height should be adjusted according to the thickness of your material. Typically, the blade should protrude 1/8 to 1/4 inch above the workpiece.
- Fence Alignment: Align the rip fence parallel to the miter slot. Use a measuring tape or a dial indicator for precise adjustment.
- Install Safety Features: Check that the blade guard, riving knife, and anti-kickback pawls are mounted and adjusted correctly. These safety elements aid in the prevention of accidents.
- Test Run: Before starting your project, make a test cut on a scrap piece of wood to ensure everything is set up correctly and that the saw and the saw blade are functioning smoothly.
Learn how to set your DeWalt table saw stand in this guide
Basic Table Saw Techniques
Now that your table saw is set up, let’s dive into how to use a table saw properly with some fundamental cutting techniques:
Rip Cuts
Rip cuts are made parallel to the grain of the wood. Follow the steps below to achieve a rip cut:
Set the blade depth and angle
Measure and mark the desired width on your workpiece.
Adjust the rip fence to align with your measurement.
Stand to the side of the workpiece and turn on the saw.
Feed the workpiece into the blade, keeping it against the rip fence.
Push the workpiece all the way through, keeping your hands clear.
For safety, always use a push-stick
Crosscuts
Crosscuts are made perpendicular to the grain of the wood. You can use the miter gauge to achieve these cuts. See how to do it below:
Choose the right saw blade
Set the blade depth and angle
Mark the desired length on your workpiece.
Adjust the miter gauge to the desired angle (usually 90 degrees for crosscuts).
Position the workpiece against the miter gauge.
Turn on the saw and carefully push the workpiece through the blade.
Bevel Cuts
Bevel cuts are angled cuts made through the thickness of the material. You can achieve a bevel cut by following the steps below:
Choose the right saw blade
Adjust the blade height and bevel angle to your desired settings.
Carefully feed the workpiece through the blade while keeping it against the rip fence or miter gauge, depending on the cut type.
Dado Cuts
Dado cuts are grooves carved into wood that allow another piece of wood to fit inside. To make a dado cut, follow these steps:
Install a Dado blade on your table saw.
Adjust the height and width of the dado blade as needed.
Use the rip fence or miter gauge to guide the workpiece as you cut.
Read: The Best Portable Jobsite Table Saw Reviewed (Suitable for all Budgets)
Advanced Table Saw Techniques
Once you’re comfortable with the basics of how to use a table saw, you can explore more advanced techniques to expand your woodworking skills. I have listed some advanced cutting techniques you can try out below:
Resawing
Resawing in woodwork is the process of cutting a thick board into thinner sections, usually to create thinner boards or veneers from a single piece of wood. This technique allows you to maximize the use of a single board, creating multiple thinner pieces for different applications such as veneering, paneling, or creating complex inlays.
To resaw effectively on a table saw, follow the steps below:
- Prepare your workspace: Make sure your workspace is clean, well-lit, and free of debris and obstruction to allow for safe and effective production
- Choose the Right Blade: Choosing the right blade for your table saw is a must, for this purpose, it’s usually one with fewer teeth per inch (TPI) to improve cutting speed and reduce heat buildup.
- Adjusting the blade height: Adjust the blade height according to the desired thickness of the board you want to saw. Make sure it is a little higher than the thickness of the material to avoid jamming.
- Set the fence: Position the rip fence parallel to the desired width of the thinner board you plan to create. Make sure the fence is parallel to the blade.
- Safety precautions: Always wear safety equipment, including safety glasses, hearing protection, and dust mask. Stand to one side of the blade to avoid any possible kickback
- Feed the material: Carefully push the plank onto the blade, keeping the plank flat against the table and fence. Use a push stick or feather board to maintain steady pressure and guide the board through the cut.
- Maintain a constant pace: Maintain a constant pace to ensure a smooth and even cut. Avoid pushing the material too fast, as this can cause burns and blade misalignment.
- Completing the cut: Once you have finished resawing, turn off the table saw and wait for the blade to come to a complete stop before removing the thinner boards.
See Our Top Pick of Bosch Table Saw for Woodworking Professionals
Combine Miters and Bevels
Bevel cutting and miter cutting are two techniques that when combined open up countless possibilities for creating complex angles and joints in your woodworking projects. These cuts achieve both functional and decorative results, making them essential skills for any woodworker.
Miter Cuts, also known as Angle cuts: Miter cuts are made by angling the saw blade across the width of the wood. The result is an angular, precise edge. Common angles for miter cutting are 45 degrees, creating a perfect 90-degree angle where the two pieces meet. However, you can experiment with different miter gauge settings to create angles other than 45 degrees, giving you the flexibility to create geometric shapes, picture frames, or even classic dovetail joints.
Beveling Cutting: Beveling Cutting involves tilting the saw blade, creating an angled edge along the thickness of the wood. These cuts are essential for creating shapes such as chamfers or for joining parts at unique angles. By tilting the blade, you can create bevels of varying degrees, allowing you to add a personal touch to your woodworking projects. Bevels also play an important role in creating compound angles, which can be especially useful when working on complex woodworking projects.
The combination of miter and bevel cuts: The combination of miter and bevel cuts is where true artistry comes to life. This combination allows you to create complex, multidimensional angles and joints that can enhance the aesthetics and functionality of your projects. Imagine a tabletop with beveled edges that meet at precisely beveled corners, or a decorative box with a lid that exhibits a combination of beveled and chamfered corners.
The beauty of woodworking lies in experimentation and creative expression. As you dive into the field of miter and bevel cuts, you’ll discover the versatility of your woodworking tools. Try different miter gauge settings, blade angles, and wood types to achieve the perfect look for your project. Whether you’re looking for a sleek, modern design or a classic, timeless finish, miter, and bevel cuts offer endless possibilities to push the limits of your woodworking skills.
Dovetail and Box Joints
Dovetail and box joints represent the seamless fusion of utility and artistic flair in woodworking. With a table saw and the precision of either a dado blade or a thoughtfully configured regular blade, you can embark on a journey to create these remarkable joints.
Dovetail Joints: Dovetail joins demonstrate structural strength as well as beauty in woodworking. The interlocking teeth-like extensions that fan out like doves’ tails distinguish these joints. The resulting link is incredibly strong, withstanding lateral and shear stresses. Dovetail joints are commonly employed in the construction of drawers, cabinets, and fine furniture, where both durability and aesthetics are important.
Creating dovetail joints often involves the use of a dovetail jig, a specialized tool designed to guide your workpiece through the table saw and produce precise, angled cuts. The result is a set of pins and tails that interlock with mechanical precision, adding both strength and a touch of elegance to your woodworking projects.
Box Joints: Box joints, also known as finger joints, are distinguished by their simple yet robust form. These joints are made up of rectangular fingers that connect at right angles to form a grid-like design. Because of their simplicity and strong gripping capacity, they are a popular choice for building boxes, drawers, and cases.
To make box joints, use a dado blade on a table saw or a well-calibrated standard blade. You can make fingers and notches that fit snugly together by alternating cuts along the workpiece. As a result, you get a joint that not only lasts but also adds visual rhythm and harmony to your woodworking projects.
You can create dovetail and box joints with a table saw and a dado blade or a carefully set up regular blade. These joints are commonly used in furniture making for strong and visually appealing connections.
Tapering: Tapering is a fundamental woodworking technique that adds a touch of class to a variety of projects by changing a normal board into an elegant, wedge-shaped component. This artistic approach entails cutting one edge of the wood at an angle, resulting in a taper that flawlessly blends form and function.
Tapered features are common in furniture, where they improve the aesthetics and structural integrity of pieces like table legs and chair sections. Tapering with precision and refinement requires the use of a dedicated instrument known as a tapering jig.
If you are new to woodworking, check out these 8 small woodworking projects you can try
The Tapering Process: Tapering is the steady reduction in breadth down the length of a board that results in a slim, tapered end. This not only adds visual appeal but also more effectively distributes weight and stress in some woodworking applications.
Tapering is commonly used to create beautiful table legs that broaden at the top to sustain the weight of the table while tapering down to a more delicate foot. Tapered chair legs, on the other hand, provide both stability and a sophisticated appearance.
The Role of a Tapering Jig: To execute precise and consistent tapers, a tapering jig is essential. This dedicated woodworking tool is designed to guide your workpiece through the table saw at the desired angle, ensuring uniformity and safety.
By using a tapering jig, woodworkers can confidently and accurately create the desired taper, whether for aesthetic enhancements or structural requirements. It exemplifies the confluence of precision and artistry in the woodworking craft.
Maintenance and Troubleshooting
Regular maintenance ensures the longevity and performance of your table saw. Here are some maintenance tips and common troubleshooting issues
Maintenance Tips
- Clean the Table: Remove sawdust and residue after each use to prevent buildup and rust.
- Lubricate Moving Parts: Apply lubricant to moving parts like the elevation and tilt mechanisms.
- Check Blade Alignment: Periodically check and adjust blade alignment to maintain accuracy.
- Inspect Electrical Connections: Ensure all electrical connections are secure and free of damage.
- Replace Worn Parts: Replace blades, belts, and accessories when they show signs of wear.
- Keep the Blade Sharp: A sharp blade produces cleaner cuts and reduces the risk of kickback.
Troubleshooting
- Blade Burn: If you notice burn marks on your wood, your blade may be dull or your feed rate too slow. Sharpen the blade or increase your feed rate.
- Kickback: Kickback occurs when the wood is forcefully thrown back at you. Ensure proper blade alignment, use a riving knife, and maintain a firm grip on the workpiece.
- Uneven Cuts: Uneven cuts can result from a misaligned fence or miter gauge. Realign them for accurate cuts.
- Excessive Vibration: Vibration may indicate a balance issue with your saw blade. Check and replace the blade if necessary.
Conclusion
A table saw is a powerful tool that can help you achieve your desired cut in woodworking. However, this tool needs great understanding. With the proper information and safeguards, you may operate this powerful tool securely and confidently. To improve your woodworking skills, prioritize safety, devote time to setup, and practice various cutting techniques. As you acquire skills, you will be able to handle more complex projects and fully utilize the capabilities of your table saw. Good luck with your woodworking.
FAQs — How To Use A Table Saw
What safety precautions should I take when using a table saw?
Always wear safety gear, read the manual, maintain a clean workspace, use push sticks, and keep your hands away from the blade. Review our safety tips above for more details.
Can I use a table saw for cutting materials other than wood?
Yes, you can use a table saw for cutting materials like plastic and metal. However, you’ll need the appropriate blade for each material, and you should follow safety guidelines for each.
How do I choose the right blade for my table saw?
The right blade depends on the material you’re cutting and the type of cut you want. You should always refer to the manufacturer’s recommendations and consider factors like tooth count and blade diameter.
Can I perform bevel cuts on any table saw?
Most table saws allow bevel cuts, but the degree of tilt may vary. Check your saw’s specifications and adjust the blade angle accordingly.
What's the difference between a rip fence and a miter gauge?
A rip fence helps you make straight cuts parallel to the edge of the workpiece, while a miter gauge allows you to make crosscuts and angled cuts. Both are essential for different types of cuts.
How do I prevent kickback on a table saw?
To prevent kickback, ensure proper blade alignment, use a riving knife, maintain a firm grip on the workpiece, and avoid standing directly behind the cut.
What's the best way to clean and maintain a table saw?
Regularly clean the table including the moving parts, lubricate as needed, check alignment, and replace worn parts. Refer to our maintenance tips above for a detailed guide.